
The allure of wallpaper is undeniable. It adds texture, depth, and personality to a room in a way that paint simply cannot replicate. From intricate damask patterns to sleek, modern geometrics, wallpaper remains a cornerstone of high-end interior design. However, there is a complex side to this aesthetic versatility, one that many homeowners eventually face: the removal process. If you have ever stared at a wall covered in decades-old, stubborn wallpaper, you know the feeling of dread that sets in. You might be tempted to jump straight into scraping, but without the right approach, you risk damaging your walls and turning a weekend project into a home renovation nightmare.
To understand the best wallpaper removal solution, you must first understand that there is no single magic bullet. The ideal method depends entirely on the type of paper, the adhesive used, and the substrate of the wall beneath it. In this comprehensive guide, we will break down the science of removal, the professional tools required, and why, for many homeowners, the best solution involves bringing in expert help.
Decoding Your Walls: Identifying the Paper and Adhesive Type
Before you reach for a scraper, you must play the role of a detective. Not all wallpaper is created equal. The removal process for a high-quality, modern non-woven paper is vastly different from that of a vintage vinyl-coated paper installed in the 1970s.
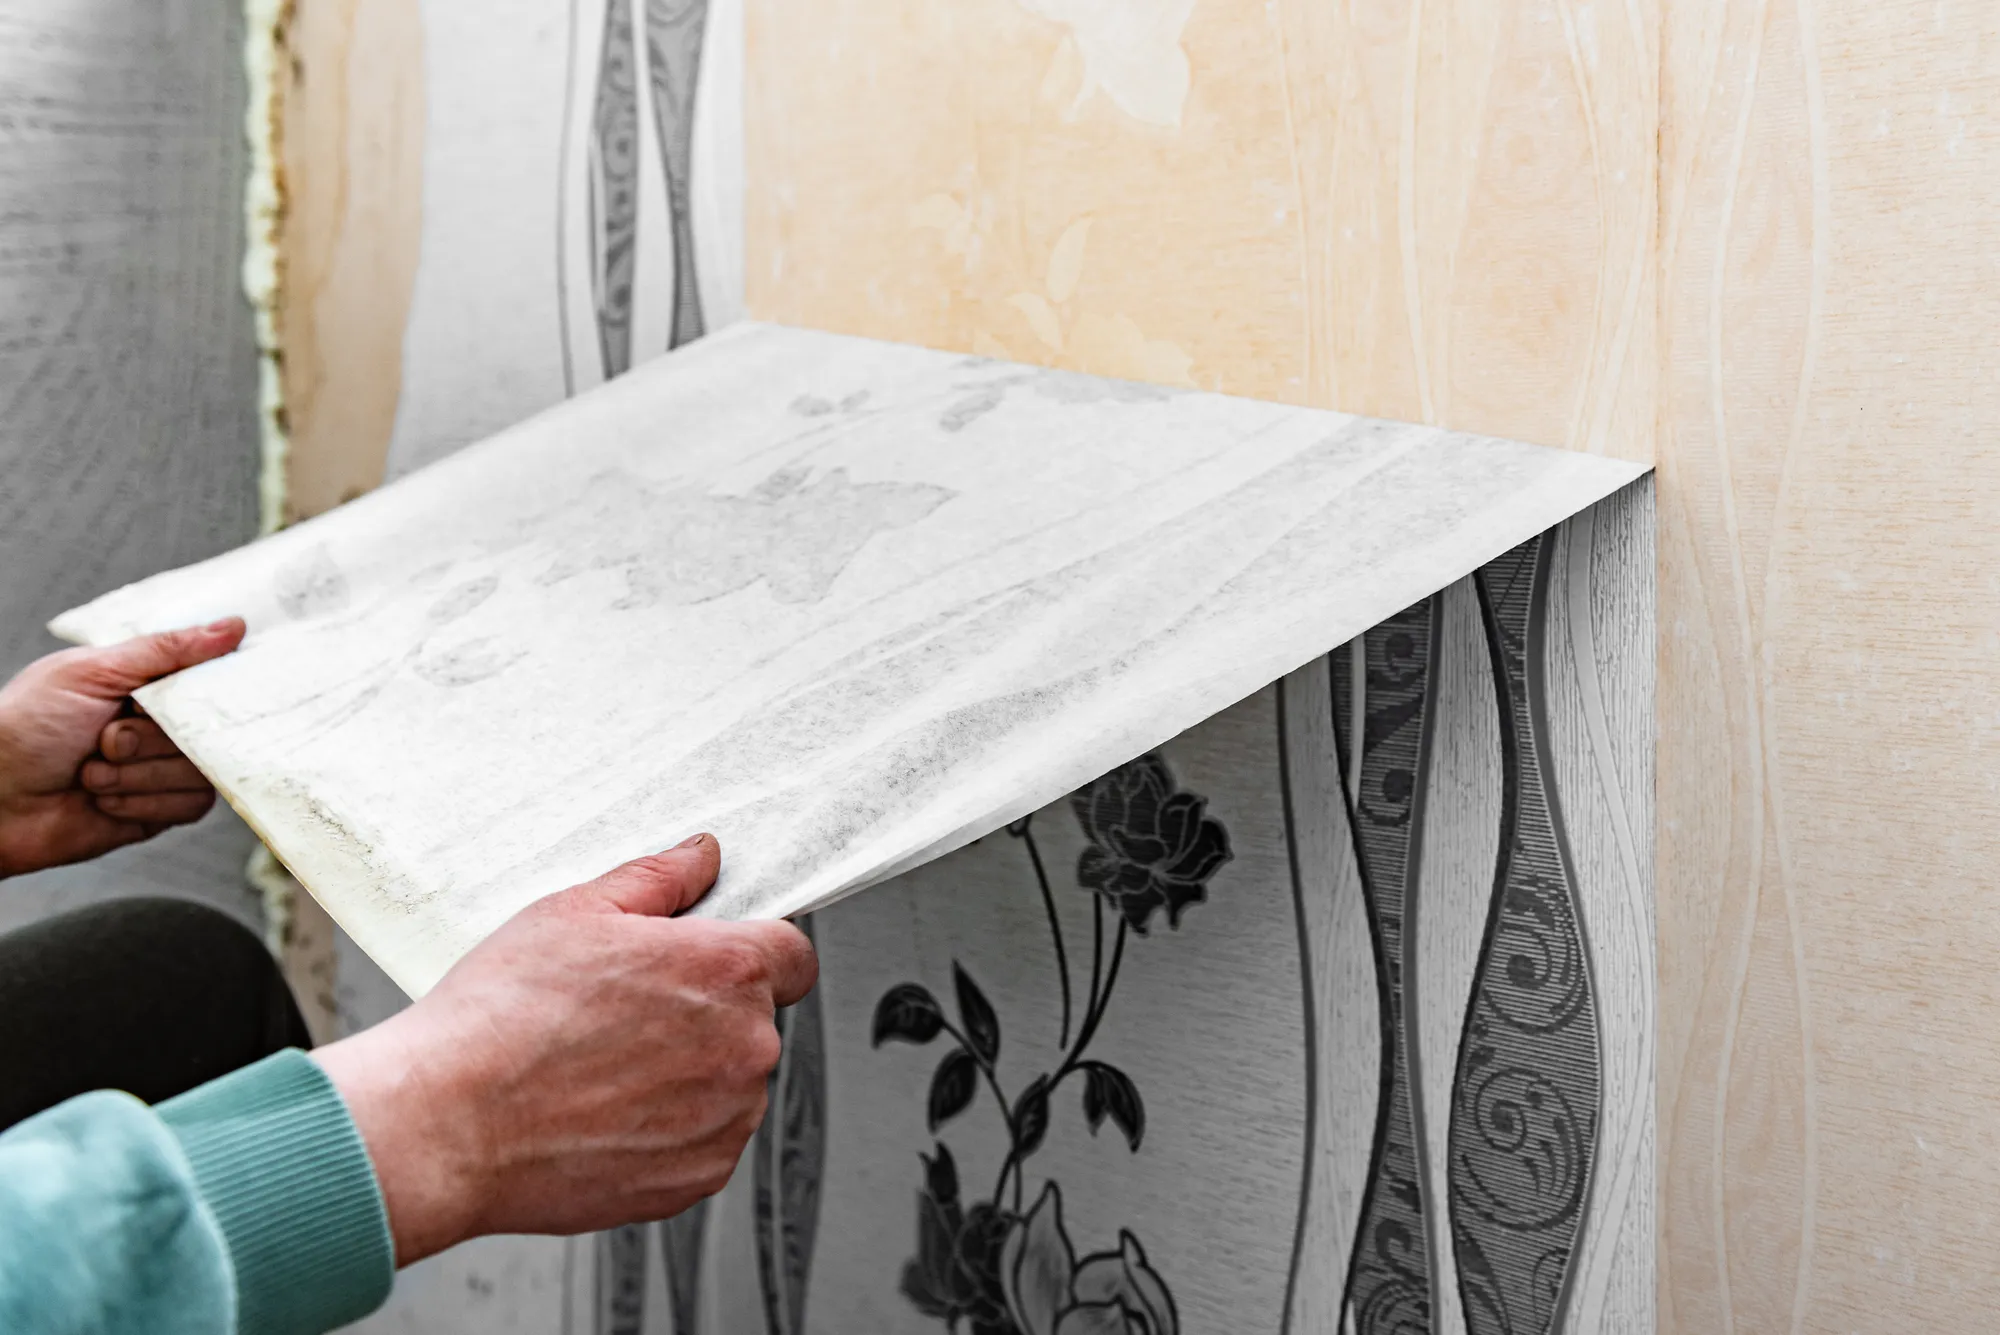
First, determine if your paper is strippable. Modern wallpapers are often designed to be pulled off in full sheets, leaving the wall relatively clean. To test this, find a loose corner, perhaps behind a door or near a baseboard, and pull gently. If the top layer peels off cleanly, you may be in luck. However, even with strippable paper, you are often left with a secondary layer of backing material or residual paste.
If the paper does not move or if it tears in small, frustrating shreds, it is likely a traditional paper or a vinyl-coated variety. Traditional papers are porous, which means they can absorb water and solvents. This makes them easier to remove because you can soften the adhesive underneath. Vinyl-coated papers, conversely, are designed to be moisture-resistant. This creates a significant barrier. If you simply apply water to the surface, the liquid will bead up and roll off without ever reaching the glue.
You also need to identify the condition of the wall behind the paper. Are you dealing with bare drywall, or was the wall primed properly before the initial paper application? If the previous installer did not prime the drywall, a common mistake, the wallpaper paste has bonded directly to the porous paper layer of the drywall. In this scenario, removal becomes high-risk. Every pull of the paper risks tearing the face of the drywall, which leads to extensive repair work involving sanding, skim coating, and re-priming. Knowing this limitation is the first step in deciding whether you can handle the job yourself or if you need professional wallpaper services in Vernon Hills, IL, to ensure the structural integrity of your walls remains intact.
Furthermore, consider the age of your home. Homes built before the 1950s often feature plaster walls rather than drywall. Plaster is more durable and less prone to moisture damage than modern drywall, but it also features a completely different texture and density. Treating plaster walls requires a gentler approach to ensure you do not crack the delicate finish or pull away the underlying substrate. A seasoned professional understands these structural differences immediately, which is why a DIY approach often fails where expertise succeeds.
The Toolbox: From DIY Methods to Professional Extraction
Once you have identified your wallpaper type, you must select your removal strategy. Many homeowners start by searching for the best wallpaper removal solution online and are immediately bombarded with conflicting advice. Some suggest fabric softener, others suggest vinegar, and some swear by industrial-grade chemical strippers.
The reality is that there is a hierarchy of tools for the job. At the entry-level, you have scoring tools. These are essential for vinyl papers. They create tiny, almost invisible pinpricks in the vinyl, allowing moisture to penetrate the barrier and reach the adhesive. However, you must use these with extreme caution. If you press too hard, you will score the drywall itself, leaving deep grooves that are difficult to patch.
Next, we have the removal agents. For porous papers, a mixture of hot water and a professional-grade wallpaper remover solution is usually effective. These solutions contain surfactants that reduce the surface tension of the water, allowing it to soak deep into the backing paper and rehydrate the paste.
Then, there is the steamer. This is often touted as the heavy artillery of wallpaper removal. A steamer uses heat and moisture to soften the adhesive rapidly. It is remarkably effective for stubborn, multi-layered papers. Yet, there is a caveat: heat and excessive moisture can cause the drywall to swell or the paper to lose its structural strength before it is removed, leading to a mushy wall surface.
Professional wallpaper removal often involves a combination of these techniques, executed with a level of patience and precision that is hard to replicate without experience. If you find yourself searching for wallpaper removal near me and debating whether to rent a steamer or buy a chemical stripper, consider the time investment. Professional teams utilize specialized equipment that is far superior to consumer-grade rentals, ensuring that the removal is clean and the wall is not compromised. Furthermore, professionals have access to enzymatic wallpaper removers that break down the chemical bond of the adhesive at a molecular level, a step that most DIY enthusiasts skip because these products are rarely found on standard retail shelves.
The Step-by-Step Methodology for Successful Removal
If you decide to proceed with the removal yourself, you must follow a disciplined process. Shortcuts lead to damaged walls. Here is the professional workflow for effective removal:
- Clear the Area: Remove all outlet covers and switch plates. Protect your floors with heavy-duty drop cloths. Paste and water are incredibly messy, and the slurry that drips down the wall can stain hardwood or carpet if not protected.
- The Test Patch: Never start in the middle of a prominent wall. Choose an inconspicuous area to test your solution. Apply your water or stripper, wait for the recommended dwell time, usually 15 to 20 minutes, and see how the paper reacts.
- Scoring and Soaking: If the paper is non-porous, use a scoring tool lightly. Apply your removal solution using a wide brush or a pump sprayer. Work in sections. Do not soak the entire wall at once, or the first section will dry out before you get to it.
- The Removal: Use a wide, flexible broad knife or a wallpaper scraper. The goal is to get the blade under the paper at an angle that lifts the material without digging into the wall. Work from the top down.
- The Residue Cleanup: This is the step most DIYers overlook. Even after the paper is gone, a sticky layer of paste remains on the wall. This must be washed off completely. Use a sponge and warm water with a mild cleaning solution. If you skip this, your new paint or wallpaper will not adhere correctly, and you may see bubbling or peeling later on.
This process requires a significant amount of physical labor and attention to detail. It is repetitive and, frankly, exhausting. Many people underestimate the sheer physical toll of standing on a ladder for hours, scraping overhead, and managing the chemical odors of removal solutions. This is often the point where homeowners realize that while they enjoy the design side of home improvement, they do not have the patience for the technical labor of removal.
The Hidden Dangers of DIY: Why Experience Matters
Beyond the physical labor, there is a significant risk of hidden damage that a novice might miss. When you peel back layers of wallpaper, you are exposing the wall to potential hazards. For example, if the previous homeowners did not properly seal the wall before hanging the original paper, the moisture you use to remove the paper can seep deep into the drywall and encourage mold growth.
Furthermore, there is the risk of electrical safety. Removing wallpaper involves liquid, often in large quantities. If you are not careful, moisture can drip into electrical outlets and switch boxes. A professional team knows how to tape off these areas and use specialized moisture-blocking techniques to ensure that electricity and water never mix. This is a crucial safety component that often gets overlooked during a frantic weekend renovation.
Also, consider the time efficiency. A professional team can accomplish in one day what might take an amateur an entire weekend. When you factor in the cost of renting a steamer, purchasing scraping tools, buying protective equipment, and the value of your own time, hiring professionals becomes a much more cost-effective decision. You gain the peace of mind that comes with knowing the job will be done safely and correctly, without the risk of needing to call in a repair crew later to fix gouges in your drywall.
Why Professional Expertise Matters: The Case for Hiring Out
There are moments when the DIY spirit should give way to professional expertise. Wallpaper removal is one of those times. Why? Because the goal of removal is not just to get the paper off the wall, but to leave the wall in a state where it is ready for its next life. Whether you are planning to paint or you have selected a beautiful new pattern for professional wallpaper installation, the quality of the prep work dictates the quality of the finish.
If you are looking for top-tier wallpaper services in Vernon Hills, IL, you need a team that understands the nuances of local housing, from older homes with plaster walls to modern homes with standard drywall. This is where a company like Avant Wallpaper Decor & Painting excels. Professional crews do not just scrape; they evaluate the substrate, neutralize the old adhesives, repair the drywall surface, and prime the walls with the correct product to ensure longevity.
When you hire professionals, you are paying for three specific things: speed, safety, and surface preparation.
- Speed: A professional crew can strip a room in a fraction of the time it takes an inexperienced homeowner. They understand how to use commercial-grade steamers and tools that break down adhesives faster and more efficiently.
- Safety: Removing wallpaper often involves working near electrical outlets and switches. Professionals know how to work safely around these hazards. They also know how to prevent the drywall from becoming oversaturated, which prevents mold and structural degradation.
- Surface Preparation: This is the most critical factor. Many people remove the paper, wipe the wall, and immediately start painting or applying new paper. This is a recipe for failure. A professional will sand the wall, fill the nicks and gouges caused by the removal, and apply a specialized primer. This primer seals the wall, creates a uniform surface for the new finish, and makes future removal much easier.
By choosing an experienced team, you ensure that the entire project, from the initial removal to the final installation, is handled with precision. There is a palpable difference in the final aesthetic when the wall is perfectly prepped compared to one that was rushed. Professionals have an eye for detail, noticing imperfections in the drywall that the average person might miss, allowing them to fix those issues before the new wallpaper or paint is applied.
The Aftermath: Priming and Preparing for New Wallpaper Installation
Once the old paper is gone and the wall is clean, you are not quite at the finish line. You have essentially exposed the raw or patched surface of your wall. Before you can think about the next step, you must consider the state of the substrate.
If you plan to perform a new wallpaper installation, your wall must be smooth. Any bump, gouge, or piece of residual paper will show through your new, expensive wallpaper like a mountain under a thin sheet. Professionals will often recommend a process of skim coating. This involves applying a thin layer of joint compound over the entire wall, sanding it smooth, and then priming it.
The choice of primer is vital. Do not use a standard PVA drywall primer if you want your wallpaper to last. You should use a high-quality, professional wallcovering primer that is designed to be strippable. This type of primer creates a bond that holds the wallpaper securely in place, but when it is time to remove it years down the road, it allows the paper to be pulled off without taking the drywall face with it. This is a forward-thinking investment in your home.
When you work with a team like Avant Wallpaper Decor & Painting, you benefit from their deep knowledge of materials. They know which primers work best with which adhesives and which wallcovering types. They turn the messy, chaotic process of removal and prep into a structured, reliable service. If you are struggling with the decision to DIY or hire, think about the long-term value. A professionally prepared wall will last for years, while a rushed, improperly prepped wall may require a redo much sooner than you expect. They understand the specific humidity challenges in the Illinois climate, which can affect adhesive curing times, and they adjust their techniques accordingly to ensure a perfect, bubble-free finish every single time.
Final Considerations for Your Renovation Journey
Wallpaper removal is a task that looks simple on video tutorials but is deceptively complex in practice. It requires the right tools, the right chemistry, and an immense amount of patience. Whether you are a dedicated DIY enthusiast or a homeowner who prefers to trust the experts, the key to success lies in preparation and the right materials.
If you find yourself searching for wallpaper removal near me and feeling overwhelmed by the potential for damage or the sheer scale of the work, remember that you do not have to do it alone. Investing in professional services ensures that your home is handled with care. You preserve the integrity of your walls, you ensure that your next design choice looks flawless, and you save yourself hours of frustration.
Whether you are stripping a single accent wall or an entire home, take the time to evaluate the situation. Are you prepared to manage the mess? Do you have the right equipment? Are you ready to deal with the inevitable drywall repairs? For those who want the job done right the first time, reaching out to established, local experts is the smartest design decision you can make. Your home is your sanctuary, and it deserves the touch of professional care to ensure that your walls are as beautiful as the art you choose to put on them. Trusting the process and the professionals will ultimately give you the high-quality home environment you truly desire.


